Using a Yubikey for AIX SSH login
Yubikeys offer a highly secure method for managing your SSH key for logging into AIX. SSH keys are much stronger than passwords, but like passwords they must be protected. A Yubikey provides a superior method to securely store SSH private key material in a physical token and can mitigate common attacks on SSH agents.
Yubikey 5 NFC Overview
I'm using a Yubikey 5 NFC to manage SSH keys and login to Linux, AIX, and other SSH key capable systems (ie: firewalls).
While I use Gentoo Linux, the Yubikey works with every major Linux distribution and Windows. During my testing I was able to successfully use it with OpenSSH 8.1p1 on Gentoo Linux, as well as Putty-CAC 0.74 [1] and SecureCRT 8.7 [2] on Windows 10.
The Yubikey can create onboard RSA 2048 bit SSH keys and export the public key for you to upload to the remote server for authentication. This is quite secure because the private key cannot be copied off of the Yubikey. The private key is generated on the Yubikey, it is only loaded on the Yubikey during authentication, and it cannot be exported from the key. This makes the private key very secure and tied directly to the physical Yubikey device.
As a minor disclaimer, there was an incident in 2019 where the onboard generated keys were weaker [3] on specific Yubikey products. That was fixed and Yubi issued replacements. For purposes of keeping the key material safe and unique I prefer to generate keys on the Yubikey. Other guides exist to do local RSA key generation and upload them to the Yubikey, but then the private key can be copied. Thus I still recommend onboard RSA key generation.
PIV Mode
For the SSH use case, I use the Yubikey in PIV mode [4]. There are other authentication protocols supported by the Yubikey, however they are outside the scope of this document. I will be focusing on using the Yubikey to authenticate to AIX using PIV.
In PIV mode the Yubikey is accessed as a smart card using the PKCS#11 standard [5]. Multiple SSH clients and agent support loading the card via a library module.
Yubikey Configuration Recommendations
The Yubikey has both a PIN code (local password) and a PUK code (reset password) for PIV mode. These are configured during the device setup and should be kept private. Both of these can be alphanumeric, so "PIN" is kind of a misnomer. I recommend creating good PIN and PUK codes, do not use the defaults. Use your password manager to store these.
Entering the PIN wrong too many times means you must unlock the Yubikey with the PUK code. Enter the PUK too many times, and you'll have to factory reset the Yubikey. That will require creating and distributing a new SSH key. You can create a new key at any time, the only difficulty is distributing the new key material to your hosts.
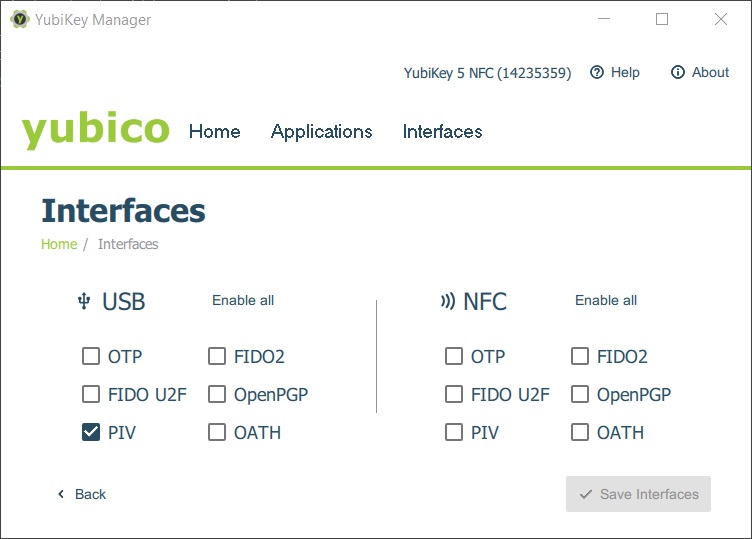
I recommend disabling NFC and all modes you aren't using. I left only PIV enabled. These can be enabled later if you choose to use them.
I recommend during the Yubikey setup that you use an RSA 2048 bit key and set your certificate to be 3-5 years in duration. SSH keys do not expire, however the Yubikey will make a certificate to accompany the key. If this certificate expires, Windows will throw warnings every time the key is loaded.
One of the best features about having a physical device associated
with your SSH key is that you can set it to require physical
interaction to authorize the use of the key. I recommend setting the
touch policy to cached. This means that when you are prompted to
touch the Yubikey to allow it to authenticate, and that it will allow
authentication for 15 seconds without requiring another touch. In my
testing I found requiring a touch every time was frustrating when
logging into multiple hosts or using a jump host, and I don't want to
completely disable this safeguard. Caching for 15 seconds is a good
compromise between usability and security.
There is a policy for the Yubikey regarding how often the PIN code
must be entered in order to use the Yubikey for authentication. I have
found that setting this to once is ok when used with a touch
policy. This means I only have to unlock my Yubikey once with the PIN
each time I plug it into the USB port. Then the touch policy prevents
it from being used without physical intervention.
- Recommendation summary:
Use good passwords for PIN and PUK.
Disable all authentication methods you don't need, keeping PIV mode.
Create an RSA 2048 bit key with a 3-5 year duration for the certificate.
Set your PIN policy to
onceand touch policy tocached.
Obtain the Yubikey Manager
There are good guides elsewhere that document the setup of a Yubikey. Here's a few resources I found helpful:
Detailed technical manual from Yubikey: https://support.yubico.com/hc/en-us/articles/360016614900-YubiKey-5-Series-Technical-Manual
Manual for
ykmanCLI tool from the YubiKey Manager: https://support.yubico.com/hc/en-us/articles/360016614940-YubiKey-Manager-CLI-ykman-User-ManualAn excellent summary of using
ykman: https://github.com/jamesog/yubikey-ssh
To configure the Yubikey, download and install the Yubikey Manager for your OS. Linux users may find it is already packaged by their distribution.
Unfortunately today the Yubikey Manager GUI doesn't support setting
the PIN and touch policies during key creation. I use the ykman
command line tool instead, and it is included with the Yubikey Manager.
Windows users will need a Command Prompt, and must cd to
C:\Program Files\Yubico\Yubikey Manager\ to use the ykman
command. Linux users will also need a terminal.
New Yubikey Setup
Plug in the new key before you begin.
Generate a random management key, and be sure to record it in your password manager. It is needed to maintain the key in the future instead of resetting it:
ykman piv change-management-key --touch --generate
Set your own PUK, do not use the default:
ykman piv change-puk
Set your own PIN, do not use the default:
ykman piv change-pin
This should only need to be performed once unless you are factory resetting the key.
Creating a SSH key
SSH keys for authentication are stored in slot 9a on the Yubikey.
First create the new SSH key. The pubkey.pem file will be created
in the current directory. This defaults to an RSA 2048 bit SSH key:
% ykman piv generate-key --pin-policy once --touch-policy cached 9a pubkey.pem
Enter a management key [blank to use default key]:
Touch your YubiKey...
Now create the self signed certificate for the SSH key with the
metadata about the key from pubkey.pem. I recommend using your
email address as the -s parameter. The duration for -d is
specified in days, and I used 10 years:
% ykman piv generate-certificate -s "Yubikey SSH Key" -d 3650 9a pubkey.pem
Enter PIN:
Enter a management key [blank to use default key]:
Touch your YubiKey...
Touch your YubiKey...
Confirm the operation by displaying metadata about your finished Yubikey:
% ykman piv info
PIV version: 5.2.7
PIN tries remaining: 3
CHUID:        3019d4e739da739ced39ce739d836858210842108421c84210c3eb34109231f797ebe8aaab77bacb0a970edd0d350832303330303130313e00fe00
CCC:  f015a000000116ff02f11726bac1ff8c46fbd65609f85af10121f20121f300f40100f50110f600f700fa00fb00fc00fd00fe00
Slot 9a:
      Algorithm:      RSA2048
      Subject DN:     CN=Yubikey SSH key
      Issuer DN:      CN=Yubikey SSH key
      Serial:         434564046181409568493503197831929142924751449169
      Fingerprint:    1b689de8bef1bd4653b53ffbc33cd1d42e29f37a462fc2337d972597d118fdf3
      Not before:     2020-11-26 17:22:55
      Not after:      2030-11-26 17:22:55
Obtaining the public key on Linux
Make sure that pcsc [6] is installed to provide the smart card library.
First we need to get the public key material from the Yubikey. We can
read this using ssh-keygen. Note that the library location varies
by distribution:
% ssh-keygen -D /usr/lib64/pkcs11/opensc-pkcs11.so
ssh-rsa AAAAB3NzaC1...long.alphanumeric.key.material...
Copy the full text of the key without wrapping. SSH public keys are a single line and will break if linefeeds are added. Alternatively redirect the public key to a file.
Obtaining the public key on Windows
In my testing I used Putty-CAC [1]. I also had to install the OpenSC driver [7] for smartcard support.
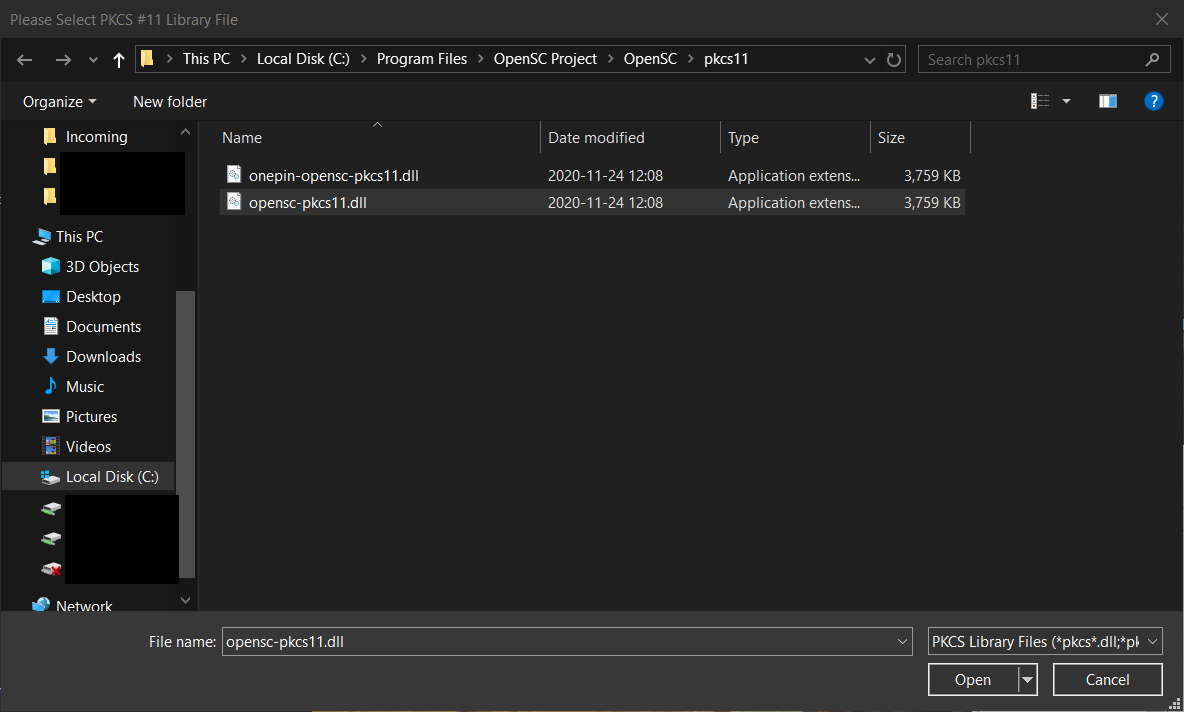
To get the public key, open Putty-CAC and go to the options for Connection, SSH, Certificate. Click the button "Set PKCS Cert".

Next select the OpenSC driver DLL.
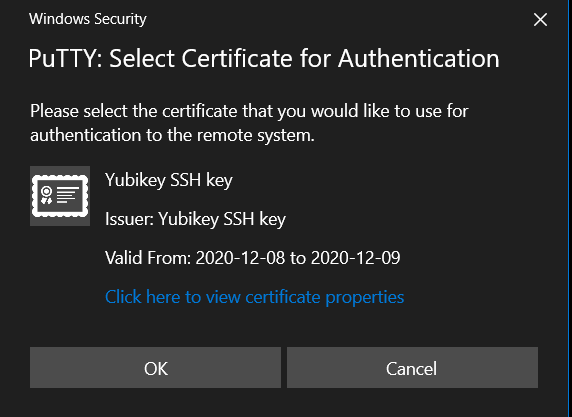
Windows security should present a popup to confirm the key.
Once loaded, click the button labeled "Copy to Clipboard" to obtain the public key text. Consider saving the public key text to a file for future reference.
Adding your new key in AIX
Login normally to your AIX host with SSH. Then append the key to your
${HOME}/.ssh/authorized_keys file. If you don't have one, here's
an example set of steps to create one:
myuser@remotehost$ mkdir $HOME/.ssh
myuser@remotehost$ chmod 700 $HOME/.ssh
myuser@remotehost$ touch $HOME/.ssh/authorized_keys
myuser@remotehost$ chmod 600 $HOME/.ssh/authorized_keys
myuser@remotehost$ cat >>  $HOME/.ssh/authorized_keys
   Paste the public key line into your terminal here
         Enter, then Control-D to end the redirect
Confirm the authorized key file is valid:
myuser@remotehost$ ssh-keygen -lf $HOME/.ssh/authorized_keys
         Prints a list of keys to confirm no editing errors
Using a Yubikey to login from Linux with OpenSSH
Logging into the remote system using the SSH key stored in the Yubikey
is fairly straightforward. The smartcard library to be loaded is
specified with -I. Note this can use other configured private keys
or ssh-agent. SSH will use any valid method to login.
For example:
% ssh -I /usr/lib64/pkcs11/opensc-pkcs11.so user@host
Enter PIN for 'Yubikey SSH key':
Last login: Thu Nov 26 18:26:52 2020 from X
user@host:~$ logout
Connection to host closed.
On executing the SSH command, it will prompt for the Yubikey PIN password, and prompt for a touch on the metal button by blinking an LED.
It would be trivial to add that setting to your
${HOME}/.ssh/ssh_config so that it is enabled for any host:
Host *
  PKCS11Provider /usr/lib64/pkcs11/opensc-pkcs11.so
Unfortunately this would prompt for the PIN and a touch every time. A
better way to do it is using ssh-agent. This way the Yubikey can
be attached to the agent once with the PIN, and require a touch for
each login every 15 seconds.
I recommend doing some reading about how to configure ssh-agent
and tools like keychain [8] before using ssh-agent daily.
Here's an example demonstrating starting the agent, adding the Yubikey, and showing the list of keys loaded in the agent:
% eval $(ssh-agent -s)
Agent pid 19373

% ssh-add -s /usr/lib64/pkcs11/opensc-pkcs11.so
Enter passphrase for PKCS#11:
Card added: /usr/lib64/pkcs11/opensc-pkcs11.so

% ssh-add -l
2048 SHA256:dK3dos940JtNhhmQXZ5CKHmV/CHwgt0R3m9eIOmpzVg /usr/lib64/opensc-pkcs11.so (RSA)
Using a Yubikey to login from Windows with Putty-CAC
Loading the Yubikey in Putty-CAC for login follows the same procedure that we use to obtain the public key text.
Open Putty-CAC and go to the options for Connection, SSH, Certificate. Click the button "Set PKCS Cert".
Next select the OpenSC driver DLL.
Windows security should present a popup to confirm the key.
Then use the main Putty menu to enter your host and port, and login normally. The Yubikey should require a touch if 15 seconds has elapsed.
Just like in Linux, Putty has an SSH agent which can keep keys ready
for use. The Windows Putty agent is called Pageant and is
included in the installation. Note that the version that shipped with
Putty-CAC is required to use a Yubikey.
To load the key, start Pageant and click the button "Add PKCS
Cert".
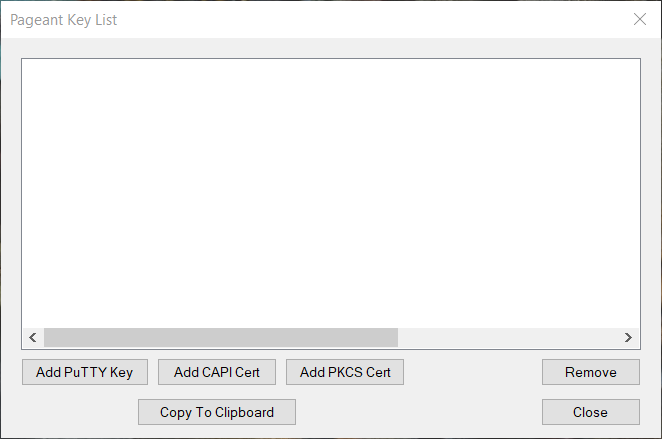
Specify the location of the DLL of the OpenSC smartcard driver.
Answer the prompts, enter your PIN, and touch the key.
Now when you open Putty-CAC, check that in the settings Connection, SSH, Auth, that "Attempt authentication with Pageant" is checked.
Then connect normally to your remote host.